Quick and Dirty Relief Terrain Backgrounds
 Sunday, June 12, 2011 at 10:33PM
 For the Sklarbro Country maps I wanted to give the feel of the National Geographic Atlas style. The problem with doing this style from scratch is associated with the well detailed shaded terrain that lies underneath all of the other mapped data. I did not have the time to go in and create the shaded relief by hand, so it became necessary to make a work around...
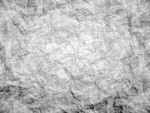
step 1: crumple up some white paper and scan it, increase it's contrast and flatten it to a greyscale
step 2: create 3 copies of the layer and rotate (90, 180, & 270) and stretch them to fit. Set the opacity on those three layers to 25%. Flatten You will have something that looks like this: 
step 4: create a copy of this layer, and then clip the texture map to your landforms
step 5: using the copy you made, compress the dimensions either vertical or horizontal to create areas of high terrain variation (presumably mountains) and then select the area that is supposed to be mountainous. Feather and then inverse the selection so you can delete the unwanted areas. and have a gradual increase in terrain relief.
step 6: play with the high relief area layer's opacity till you are happy with the result and then merge the two layers together.
step 7: using the color dodge tool to create areas with highlights and the color burn tool to create the shadows of the mapped "terrain." Follow the rivers with the burn tool to show some erosion. As far as the intensity of the dodge and burn, well, that is a matter of personal preference. In the end you will now have a terrain map that looks like this:
step 8: paint white areas to mute the relief in relatively flat areas that transition to clear for the mountainous areas. This way you can have (as in this map) coastal plains, hills, and mountains with a soft transition between the forms.
step 9: set this layer above your land color layer and below your hydro layer. Set the layer characteristics to "Multiply" and play with the opacity till you are happy. Mine looked something like this:
step 10: You are basically done with the terrain now. Add your features and finish it up. Shown here is the final terrain with features and no text elements or finishing graphics:
I hope this tutorial helps you to make something beautiful.
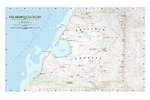
So, here is the final version for Sklarbro Country in all its glory.
 Scott |
  4 Comments |


